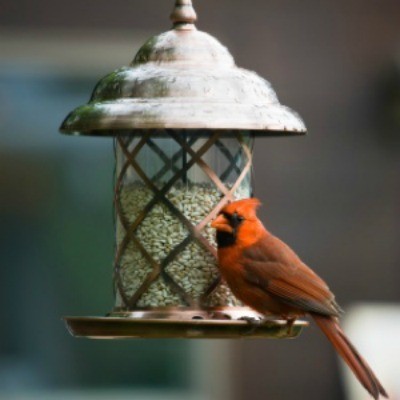
If you enjoying feeding backyard birds, cleaning and maintaining your birdfeeders is an important part of keeping your feathered friends safe and healthy. Wild birds prefer fresh, mold-free birdseed and a safe and convenient place to feed. Clean and well-maintained feeders not only attract more birds, they also reduce the risk of disease.
It's common for wooden feeders to weather and fade over the years. It is not necessary to treat wood feeders with products; however, if you wish to maintain the appearance of your feeder, you can follow these simple directions.
Feeders made from these materials are ideal for outside use because of their natural resistance to weathering. Under normal conditions, these woods require very little maintenance, however, they will gradually fade in color as they age. If you want to maintain the original color of the wood, give it a coat of non-toxic wood sealer or linseed oil every few years. Make sure you apply it to the outside area of the feeder only and not to the eating surface of the bird feeders. There are a wide variety of soy-based non-toxic wood sealers currently on the market. If you can't find one locally, check out Green Builder's Supply on the web.
Pine feeders also weather nicely, but will fade with time. Again, apply a non-toxic wood sealer or linseed oil as needed. If your feeder needs repainting, remove any loose paint flakes and sand the birdfeeder lightly. Repaint with an eco-friendly paint rated for outdoor use. Make sure the paint you use does not contain lead, zinc, or chromate.
As with all wooden feeders, inspect them for protruding nails and sharp points or edges each time you fill them with seed. Small cuts and scratches on feet and toes can quickly lead to infections.
Copper is highly resistant to corrosion, and if not preserved, acquires a beautiful green patina over time. Copper cleaners are considered toxic to birds, so if you want to restore the copper to its original luster, try one of these non-toxic recipes:
Mix 2 tablespoons salt, 1 tablespoon lemon juice and 1 tablespoon vinegar. Rub with sponge and allow to dry. Rinse with hot water and dry with a soft cloth. Or, apply a paste of lemon juice and cream of tartar and leave on for 5 minutes. Wash in warm water and dry with a soft cloth.
Cleaning your bird feeders regularly year round is important for the health of the birds. All you really need is a pair of rubber gloves, hot water, scent-free liquid dish soap, a scrub brush, and some white distilled vinegar. Fill a sink or tub with hot soapy water and let the feeder soak in it for 10 or 15 minutes to loosen up any caked-on debris. After soaking, give the feeder a good scrubbing, then rinse well and let it air dry. For tough jobs, refill with clean water and 4 cups of vinegar. Let the feeder soak for 1 hour. Rinse thoroughly and let it air dry.
Because hummingbird feeders are filled with a sugar solution, they need to be cleaned more frequently than other types of feeders. This chore is much easier if you start out with a feeder that has parts that are easy to disassemble and clean (stick it in the dishwasher!). Every time you refill your feeder with nectar, wash it out with hot water (no soap). Use small bottle brushes, toothbrushes, pipe cleaners, or cotton swabs to clean visibly dirty nectar ports. Adding a few rice grains or course salt and lemon juice can also be useful scrubbing agents for hard to reach places. Make sure you rinse everything thoroughly. How often you change the nectar depends on the weather.
At least once a month soak the feeder in full-strength white distilled vinegar and clean with a bottle brush. Rinse well with warm running water. Evidence suggests that using bleach to clean plastics containing polycarbonates (like those found in some feeders) can accelerate the leeching of bisphenol A (BPAs). It's not yet known if this is harmful to birds, but it's better to be safe than sorry and avoid using bleach.
Keeping the area under your feeders clean and free from debris is an ongoing chore. Use a broom or shovel to transfer fallen seeds and droppings to your compost pile and cover them with a layer of mulch. If your compost pile is "cold", you may eventually see some seeds germinate. Simply turn them under.

About The Author: Ellen Brown is an environmental writer and photographer and the owner of Sustainable Media, an environmental media company that specializes in helping businesses and organizations promote eco-friendly products and services.
Add your voice! Click below to comment. ThriftyFun is powered by your wisdom!
Add your voice! Click below to comment. ThriftyFun is powered by your wisdom!