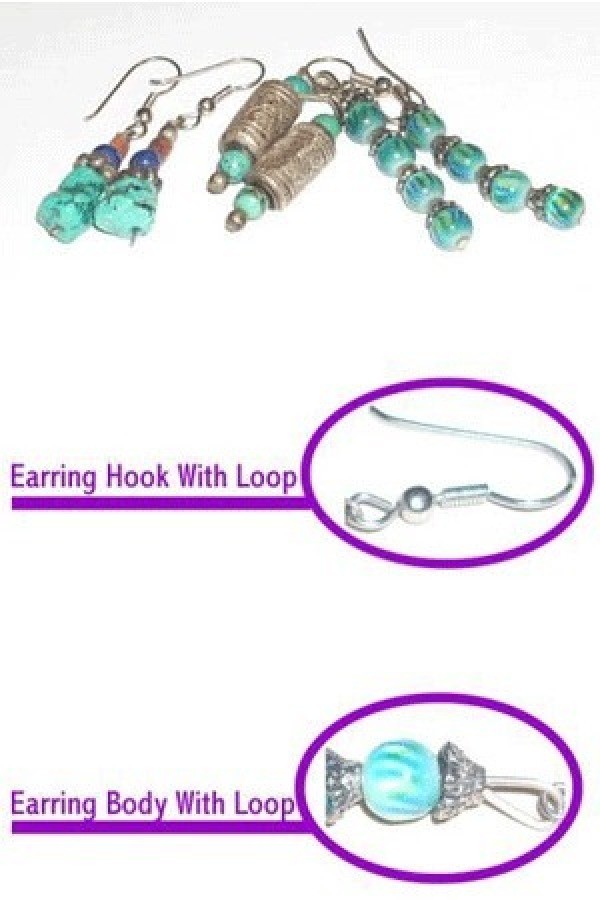
If you're bored with just beading bracelets and simple necklaces, try taking the next step and start making beaded earrings. You just need an ear hook with a loop to connect to. Then you need an earring body, or something to decorate. Then you need the decoration, otherwise known as beads!

Approximate Time: 10-30 minutes
Supplies:
- earring hooks with loops (2)
- assorted beads
- wire or earring body
- glue
- pliers
Instructions:
- Set out some wire, an earring loop, beads, and some glue.
- Twist the end of the wire into a little loop, to keep the beads from falling off, then add the beads desired.
- Tie the top of the wire into a little loop, holding the beads in place.
- Attach the wire loop to the earring loop and voila!
- Once you've mastered this, the next step becomes learning different ways to connect the earring or twist the wire. A simple, small, loop is cute, but can easily break. It's usually best to loop the wire, then twist the two pieces around each other, making the loop stronger.
- You'll need some tools to do fine cutting and twisting, so an assortment of pliers will come in handy, as will wire cutters. Needle nose pliers are required for fine details, and thick pliers are required for general shaping.

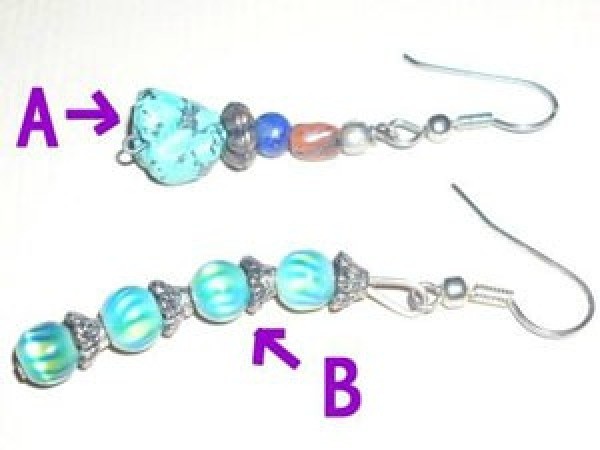
- The earrings marked "A" in the picture use a small loop on the body, and a big loop on the hook. The earrings marked "B" in the picture use a big loop on the body, and a small loop on the hoop. Earrings "A" use a small loop at the bottom of the earring. Earrings "B" use a small bead.
- To make earrings "A", simply take a piece of wire and make a small, wide loop at the end. Stack beads on, starting thickest and biggest and ending with the thinnest and smallest. Then make a small loop, clip wire, and tuck wire end into the top bead. Glue if needed.
- Remember to hook your loop around the hook loop if needed. Some hook loops will open, so you can slip the beads on, but most are closed, so you have to wrap the wire around the loop to connect.

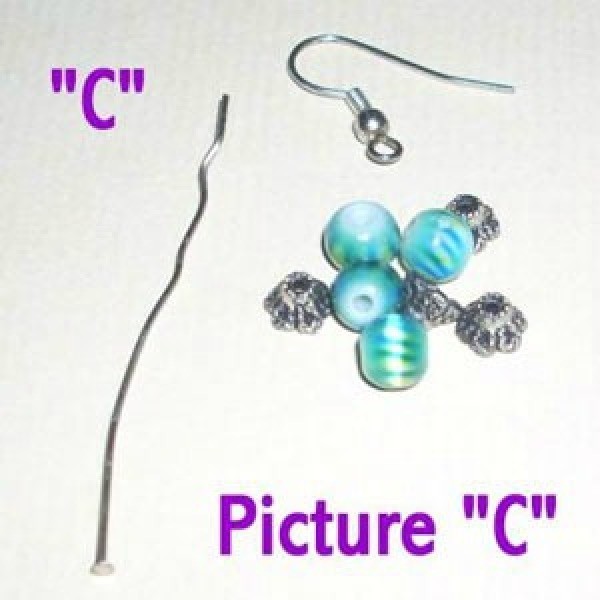
- To make earrings "B", simply take four matching round beads and four matching disc beads and stack them. Put the tiny flat piece on the end of the wire, or use an earring wire that looks like a long, flat, pin (as shown in picture marked "C") then lace round bead, disc, round bead, disc, round bead, disc, round bead, and disk.
- Make a large loop around your hook loop with the wire, then cut and tuck the end into the bead. Add a little glue to keep it secure.
Experiment with all the different materials, matches, and methods you can use when making earrings. Remember that lines count, so always try to keep your overall earring shape smooth and fluid, never clunky and uneven.
One thing many beginners do is "over-design" and "over-decorate" their jewelry, so keep it on the simple side when starting.
Notice that earrings "A" go from big to small, creating balance. Notice that earrings "B" create a flowing line, repeating the two contrasting beads.
The third pair of earrings pictured, the silver cylinders with turquoise beads are simple, elegant, and easy to match with many different outfits. How to make this earring is obvious! Just thread a small bead, medium bead, cylinder, medium bead, then twist onto loop and you're done!
By Aysha from Boise, ID


