Harlean
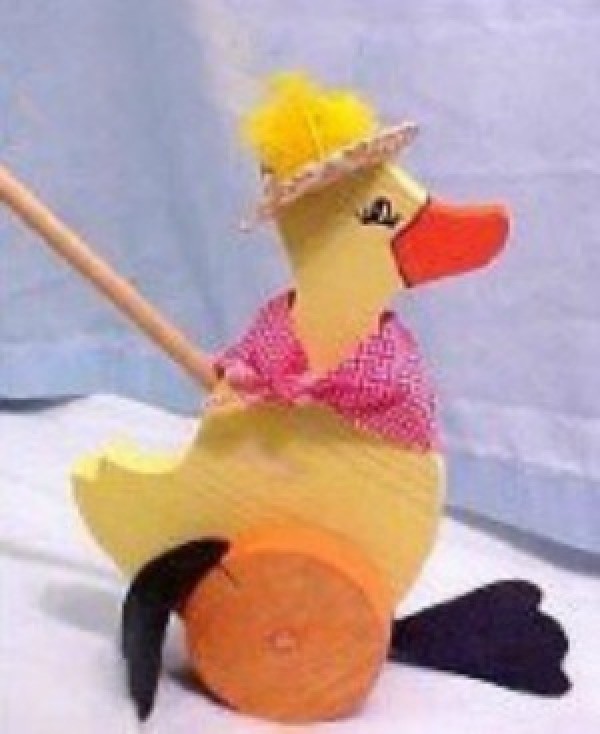
Bronze Post Medal for All Time! 148 Posts This duck is sure to delight the little ones.
It is a wood project, and does require either a scroll saw or a jig saw, but the smiles of those little ones is a great reward in return for time spent on the project.

Supplies:
- pine board - 1x8x16 inches
- 36 inch dowel, 3/8 inch diameter
- piece of rubber for floppy feet
- water based paint in yellow, orange, and white
- black Sharpie marker
- wood glue
- hot glue and glue gun
- 3 inch straw hat
- feather for hat
- scrap of fabric for bandanna
Instructions:
The instructions are also in a PDF file for which you may need Acrobat Reader to view. Download Acrobat Reader
Click here to download the Duck Push Toy Instructions in PDF format, including the full size pattern templates.
- Trace patterns of the duck and the wheel from page 2 of the PDF onto your pine board and cut out with a scroll saw. Sand edges lightly.
- Mix 1 part yellow paint with 5 parts water in a shallow pan. A paint roller tray will work for this.
- Dip the duck into the mixture or apply to both sides and the edge with a sponge. Let this stand for a minute or two then wipe dry with a soft cloth. Set aside, and repeat the process with the wheels, using orange paint for the mixture.
If you are planning to make more toys, you may save the paint in covered containers.
- Using the photo as a guide, add the features. Paint the beak orange, draw the eye and outline the beak with the Sharpie.
- Dip a toothpick in white paint and put a dot in the middle of the eye for a highlight.
- Repeat the details on the other side of the duck.
- Drill a hole in the center of each wheel, using a 3/8 inch bit, and cut a 1/2 inch slit in the edge for the feet. Drill a 16/32 inch hole in the body as indicated on the pattern.
- Cut a 2 1/2 inch piece from the dowel for the wheel axle. Pass the wheel axle through the body of the duck, and glue a wheel on each end of the axle. Position the wheel flush with the end of the axle and the slits for the feet with one foot up and the other foot down.
- Glue the feet into the slits, taking care that the flat side of the foot is against the body of the duck.
- Cut the remainder at 30 inches for the handle.
- To attach the handle, see the detail sketch for angle of the hole to drill in the duck's back. Use a 3/8 inch bit and drill the hole about an inch deep at the determined angle.
- Apply glue and insert the dowel, tapping it into place if necessary. You can dress the end of the handle as you wish.
- We used an inexpensive birch cabinet drawer pull and drilled out the center to allow the insertion of the dowel. Glue into place.
- Using the bandanna pattern on page 3 and a pair of pinking shears, cut the bandanna and tie loosely around the duck's neck.
- Pull down slightly on the side opposite the knot. Attach the straw hat to the top of the duck's head with hot glue. Hold in place until it cools enough to stay put. If you like, add a feather to the hat.
About The Author: Harlean Greathouse is a mother of three who has been married for 45 years. Long time readers of ThriftyFun will probably recognize her as Harlean from Arkansas, the name she has posted under as a valuable member of the ThriftyFun community. She specializes in wood crafts and enjoys designing crafts using recyclable materials, knitting, crochet and has been an arts and crafts vendor for over 35 years.
Add your voice! Click below to comment. ThriftyFun is powered by your wisdom!

